anynode采用的是KVM架构,重装系统时需要自行挂载系统镜像,以及使用VNC连接后,手动安装。略显麻烦了一些,有的童鞋用起来较麻烦,所以写一个教程。
安装成功后,可以SSH,但网页打不开,可能是防火墙原因,执行:iptables -F
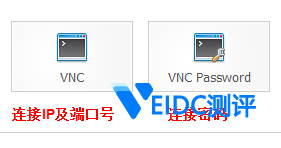
一、登陆VPS面板,分别找到下图,得到VNC连接IP、端口号,以及自行设置VNC密码:
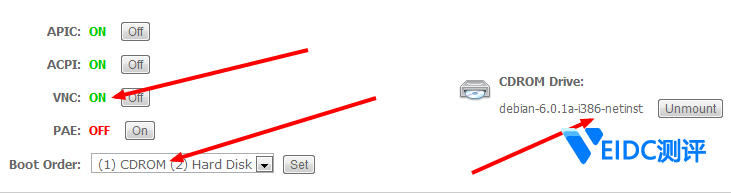
二、主面板,设置VNC为ON,光驱为启动第一序列,装载一个系统ISO文件:
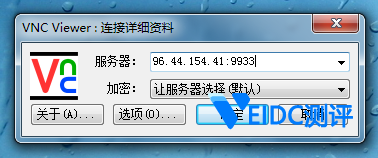
三、重启你的VPS,并使用VNC Viewer按照IP和端口号,连接上:
四、进入安装界面,如果未能进入,请检查第二步设置,或再次重启你的VPS:

五、接下来选择,简体中文,然后,就是全中文操作了。其中有一步是让您选择,服务器组件的。如果您不要桌面,用空格,取消前面的*号就可以了。
六、详细安装教程如下:
1.选择简体中文

2.设置区域为中国

3.键盘布局选择美国英语

4.输入主机名,域名,ROOT密码之类。按提示操作,磁盘使用整个磁盘就可以:

5.镜像服务器,一定要选择美国,否则会很慢很慢很慢:

6.选择服务器组件,小内存就不要装图形界面了,太卡。如果要SSH管理,一定要勾选SSH。

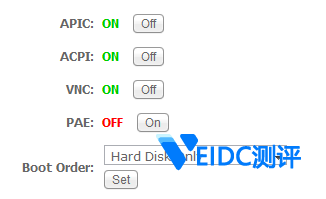
7.最后一步,这个时候需要去面板,设置为硬盘重启,然后,再VNC里继续就OK了。

重启后,安装完成。就可以用VNC或SSH管理了。